Composting at home is a rewarding way to reduce waste, enrich your garden soil, and contribute to a healthier environment. If you’re new to composting, it might seem a little overwhelming at first. But with a few simple tips, you can create your own compost pile or bin and start turning everyday organic scraps into valuable compost. This guide will walk you through the basics and provide helpful advice to get you started successfully.
What is Composting and Why Should You Start?
Composting is the natural process of recycling organic material, such as food scraps and yard waste, into a dark, nutrient-rich soil amendment known as compost or humus. It helps reduce the amount of waste sent to landfills and provides an eco-friendly way to nourish your garden plants.
Benefits of composting at home include:
– Reducing household waste and lowering your environmental impact
– Improving soil texture, fertility, and moisture retention
– Supporting healthy plant growth without chemical fertilizers
– Encouraging beneficial soil organisms like earthworms and microbes
Choosing the Right Composting Method
Before you begin, consider the available space, the amount of organic waste you generate, and your local climate. Here are common composting methods suited for beginners:
1. Compost Bin
A compost bin is an enclosed container designed to hold compost materials. It helps keep the compost tidy, retains heat, and deters pests.
– Easy to find at garden centers or online
– Good for small to medium amounts of waste
– Choose a bin with good ventilation and drainage
2. Compost Pile
An open pile works well if you have ample backyard space and don’t mind a less contained approach.
– Can be started by simply piling materials in a corner of the yard
– Requires occasional turning for aeration
– May attract animals if not managed properly
3. Vermicomposting (Worm Composting)
Using red worms to break down food waste in a small indoor bin is ideal for apartment dwellers or small spaces.
– Produces high-quality worm castings
– Needs a bit more attention and care
– Great for kitchen scraps like vegetable peels and coffee grounds
What Can and Can’t Be Composted?
Knowing which materials to include or avoid will help produce a healthy compost pile.
Compostable Materials (Greens and Browns)
– Greens (Nitrogen-rich): Fruit and vegetable scraps, coffee grounds, tea bags, fresh grass clippings
– Browns (Carbon-rich): Dry leaves, straw, shredded newspaper, cardboard, small branches, paper towels (unbleached)
Avoid Composting
– Meat, fish, dairy, and oily foods (can attract pests and cause odors)
– Diseased plants or weeds with seeds
– Pet waste and litter
– Non-biodegradable materials like plastics and synthetic fabrics
Step-by-Step Guide to Starting Your Compost
Follow these steps to create your first compost pile or bin:
1. Set Up Your Compost Space
– Choose a dry, shady spot near a water source
– Place your bin on soil or grass to allow worms and microbes access
– If using a pile, mark out a 3 ft by 3 ft area for easy maintenance
2. Add Your Materials in Layers
– Start with a layer of coarse browns like straw or small branches to allow airflow
– Alternate between green and brown layers, roughly 2 to 3 inches thick each
– Avoid adding large amounts of greens at once to prevent odor
3. Maintain Moisture
– Compost should be as damp as a wrung-out sponge—not soaking wet or dry
– Water the pile occasionally if it feels dry, especially in warm weather
4. Turn the Pile Regularly
– Use a garden fork or shovel to mix the compost every 1 to 2 weeks
– Turning introduces oxygen that speeds up decomposition
– If you notice a strong odor, turning will help aerate and balance moisture
Troubleshooting Common Composting Issues
Sometimes your compost may not decompose as expected. Here’s how to fix common problems:
– Foul odor: Usually caused by too much moisture or greens. Add dry browns and turn the pile.
– Pile too dry: Add water and green scraps.
– Pile too wet: Add more browns and turn to improve airflow.
– Slow decomposition: Chop or shred materials to increase surface area and turn more often.
Using Finished Compost
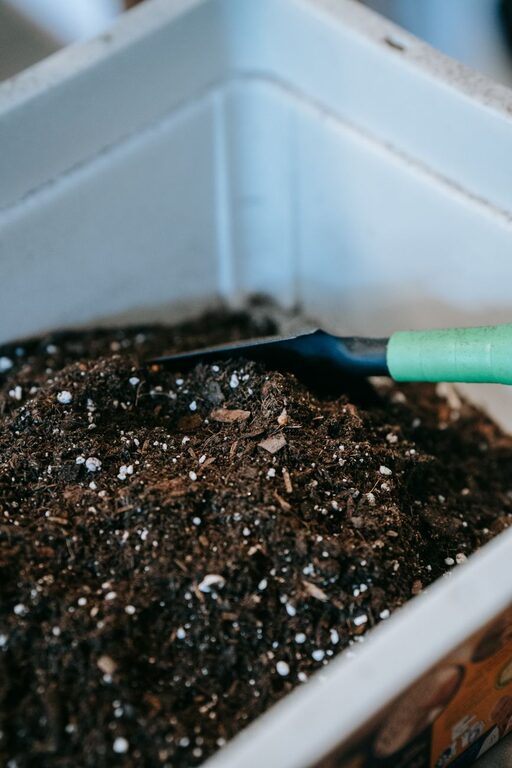
Your compost is ready when it looks dark, crumbly, and earthy, with no identifiable scraps. This can take anywhere from 2 months to a year depending on conditions.
– Use it to enrich garden beds by mixing it into existing soil.
– Top-dress around plants and trees for slow nutrient release.
– Mix with potting soil for container gardening.
Tips for Successful Home Composting
– Be consistent with the materials you add.
– Avoid adding large quantities of one material.
– Chop or shred larger items before composting.
– Keep a small kitchen compost bin to collect scraps, then transfer to outdoor bin.
– Use a compost thermometer to monitor temperature if you want to speed up the process.
Final Thoughts
Composting at home is a simple and effective way to reduce waste and produce healthy soil for your plants. By following these beginner tips, you’ll be on your way to creating a thriving compost system that benefits both your garden and the environment. Remember, composting is part science and part art, so don’t worry if it takes some practice to get it just right!
Happy composting!
About the Author